A few weeks ago I provided a step by step guide on how to use a Canon DSLR to stream live to Facebook. You can check out that out here. I want to follow that up with a neat trick I learned while learning how to stream live to Facebook.
As many of you know, DSLR cameras have a digital zoom feature that allows you to zoom in very closely to focus on the subject matter. With my Canon 5D Mark iii I am able to zoom in 5x as well as 10x. The rub is you can’t snap pictures or record video to the camera at these ultra close ranges, as macro lenses and extension tubes are the primary means to get close (I have heard of folks using a magnifying glass but I have not attempted this trick).
Nonetheless, I have discovered a way to overcome this limitation and actually record ultra close up photos and video without using a macro lens or extension tubes. You can do it using the same apps used to stream live to Facebook. Please note this tutorial is specifically for Canon DSLRs and Macs, although I am sure it is doable in Windows and for other DSLRs.
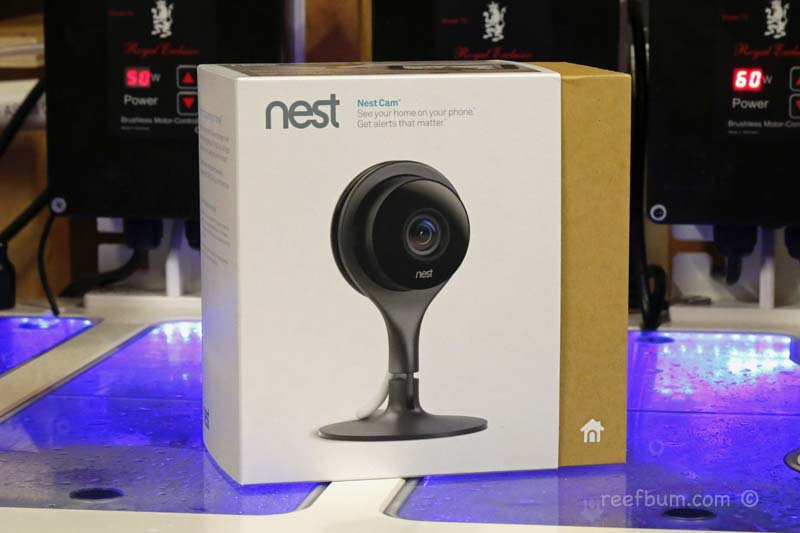
To start you will need a USB cable to connect the camera to the computer as well as the Canon EOS Utility, Camera Live, Cam Twist and OBS. Use these links to download the apps.
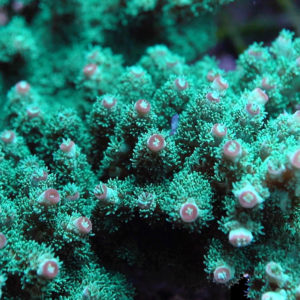
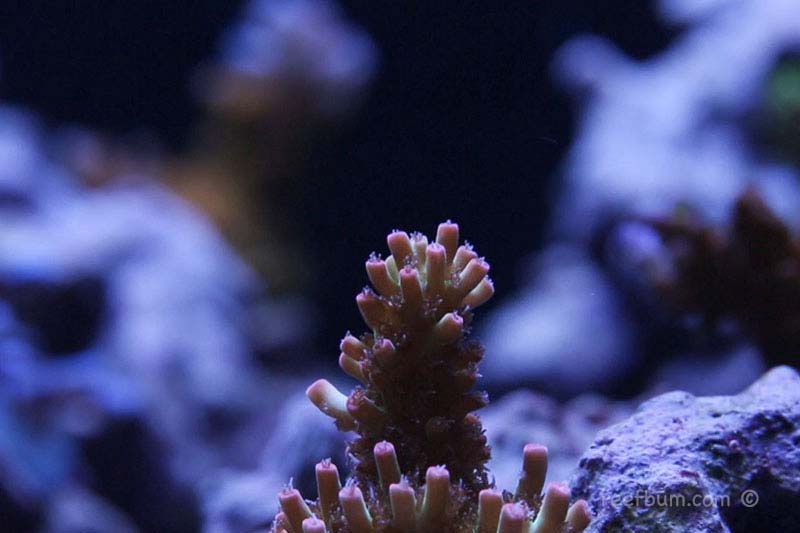
For my camera I am only able to record the 5x zoom, but this is still an amazing improvement over what the lens is capable of doing. However, when you use a macro lens and or extension tubes you can get even closer. Here is the view of what my macro lens can record.
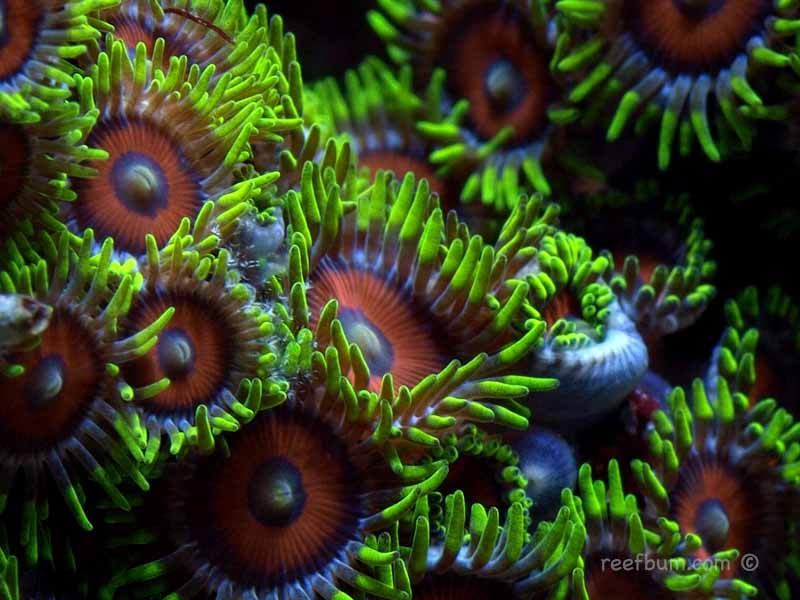
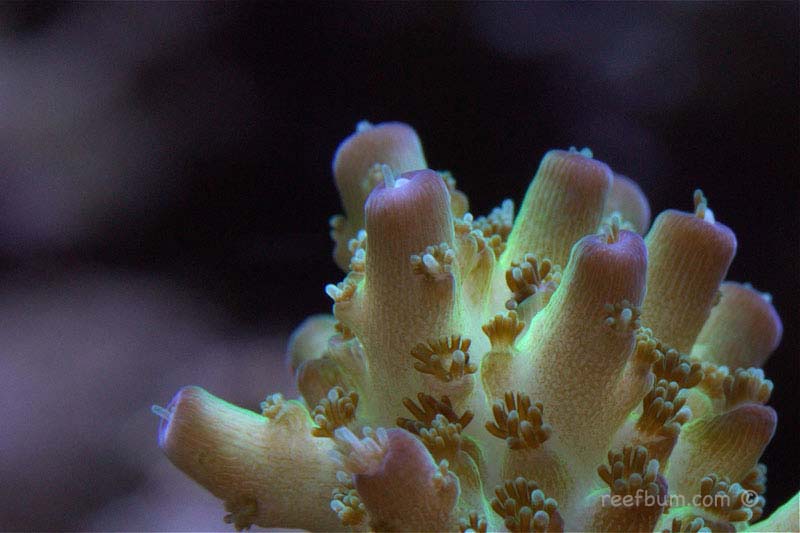
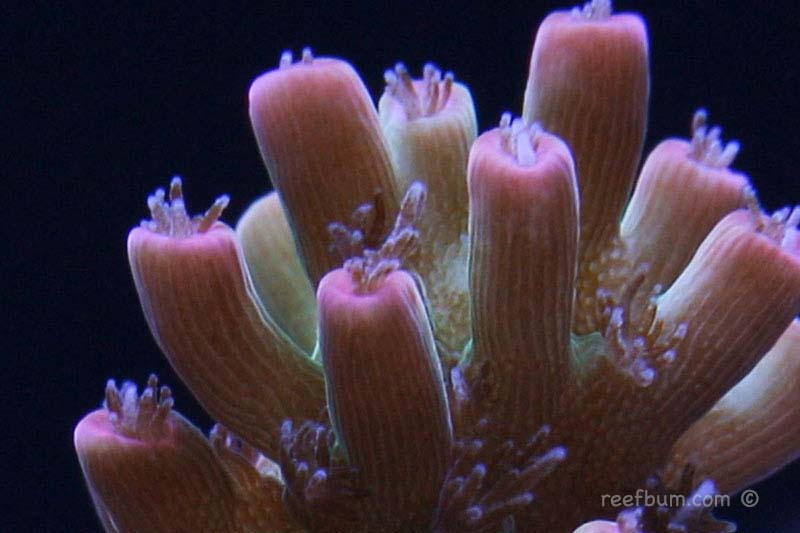
And here is what it can record using the 5x digital zoom. Check out the details!
Once everything is loaded onto your Mac you can follow these steps to record what you see in digital zoom:
- Open up Camera Live
- Connect DSLR to Mac with USB cable and turn on DSLR in video mode
- Launch Cam Twist
- Click “View” in the menu at the top and then “Main Window”
- Double click “Syphon” under the Step 1 menu and then select “Camera Live” as the Syphon Server
- Minimize both the Camera Live and Cam Twist apps
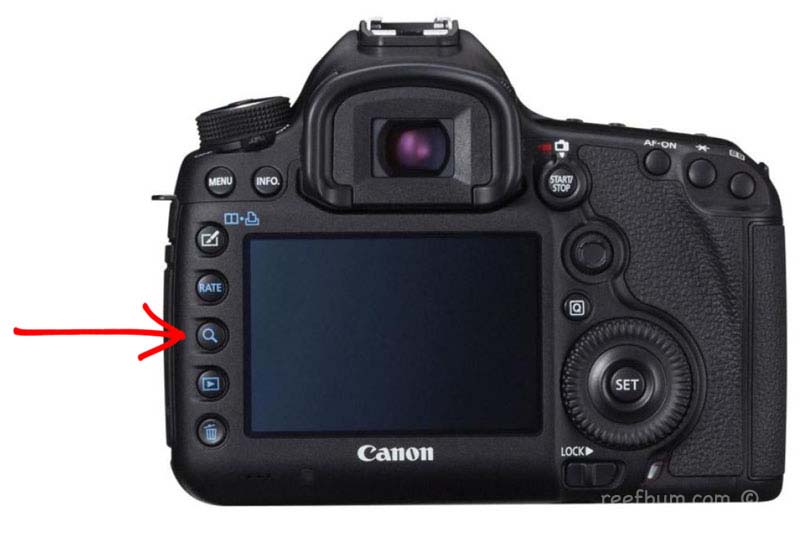
- Open up OBS
- Make sure you have “Video Capture Device” selected under Sources
- Select “Settings”
- Select the “Video” tab and make sure you have the Base (Canvas) Resolution set to 2560×1440, the Output (Scaled) Resolution set to 1920×1080, the Downscale Filter at Bicubic (Sharpening scaling, 16 samples) and the Common FPS Values set to 30
- Select the “Output” tab
- Under Recording, choose a destination for the video to be saved to
- For Recording Quality select “Indistinguishable Quality, Large File Size”
- Choose a recording format. I use .mov
- Select “Software (x264)” for Encoder
- Click “Ok” to go back to the main menu
- Hit “Start Recording”
- Press digital zoom button on DSLR
You are now off to the races!
The last step is to crank down the volume on your computer’s speakers. If you don’t then you will get some bad echoing on the audio recording. And one VERY important thing to note, don’t totally mute the volume. If you do then it will cause the video to buffer. Just go with one bar of sound. Once you are finished recording you can go to the folder where the video is saved to view the finished product, a super close up video captured by your camera’s digital zoom! You can then bring the file into your video editing software to make any necessary adjustments such as sharpening up the video.
As for photos, in my video editing software, Adobe Premiere Elements, I can actually grab a frame of the video and export it as a bitmap file. So ultra-close up pictures can be generated as well, all possible by utilizing the above procedure to record what is seen on the camera’s digital zoom! This video provides a more visual tutorial of all the steps outlined above.
**NOTE**
Some of you have had problems getting the Camera Live app to work. I think I have found a solution in which you don’t need Camera Live or the Camera Twist app. Here is possible work-around:
- Turn camera on and have it plugged into your computer
- Open up the EOS Utility and select “Remote Shooting”
- Another window pops up. Select “Live View Shoot”
- This opens up another window that displays what your camera is shooting
- Open up OBS and click on the + sign under “Sources” and select “Window Capture”
- Set window to “Remote Live View Window”
Then follow the rest of the instructions I laid out in the article.
Additional Resources
If you would like some help with a new tank build, including help designing a custom aquarium, or help re-configuring your current setup then you can visit this page for more information. And if you are looking to add some equipment, I do sell GHL, Pax Bellum, Reef Octopus Calcium and Kalk Reactors and Royal Exclusiv products, including Dreamboxes, which is the equipment I use and recommend. I also sell Reef Brite metal halide and LED fixtures as well as Maxspect & IceCap Gyres.
As for additional insights and information, please explore my many other reef tank and SPS related articles as well as my YouTube channel. For an even deeper dive into reef tank care you can check out my Reef Keeping Master Class. This online course is an immersive and one of a kind educational tool designed to help reef aquarium hobbyists build and maintain a beautiful SPS reef tank. The course is a series of video presentations with some supplemental video from my YouTube channel. There are also quizzes to help students retain and understand the information presented in the course.
Need some frags…..I can help with that as well 🙂 Please visit my SPS Frag store to see what is available.